 |
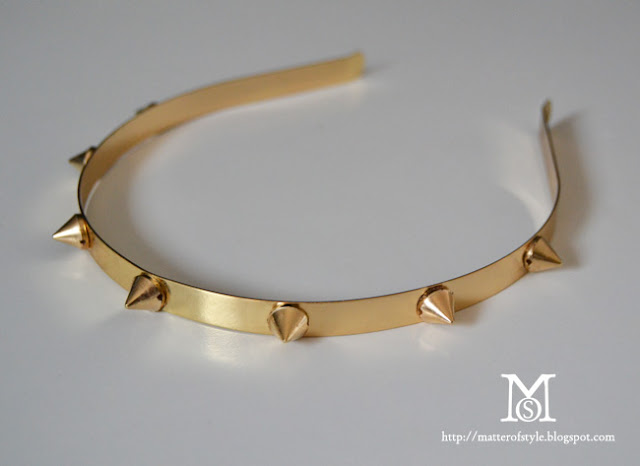
| DIY studded headband |
Bad girls are always glamourous. If your style is
glam rock this headband is thought to bring a touch of aggressiveness in your everyday look while remaining chic. Try to wear this
studded headband with a boucle, chanelesque jacket and a pair of black thight jeans.
This is a very
quick diy and I'm going to insert it in a new
diy category you can now browse from the
navigation bar under the title called
10 minutes DIY.
It collects all my
diy tutorials that can be completed
quickly so you don't have to wait to wear your
new diy must have!
To make this
spiky headband you'll need:
- gold metallic headband 1 cm wide (this one is from H&M)
- cone stud beads (yes they're beads! they can be sewed or glued)
- glue
Kate Moss ci insegna: le bad girls hanno sempre il loro fascino. Per voi che amate lo stile glam rock e non volete rinunciare ad un tocco di aggressività anche nel look di tutti i giorni oggi vi mostrerò un tutorial per realizzare un cerchietto decorato con le borchie. Provate ad indossarlo con una giacca di ispirazione Chanel e un paio di skinny jeans neri.
Questo è un
tutorial davvero veloce che inserirò in una nuova categoria chiamata
10 minutes DIY. La trovate nella
barra di navigazione sotto al titolo e raccoglierà tutti i tutorial che possono essere completati velocemente, così non dovrete aspettare per indossare il vostro nuovo
must have fai da te!
Per realizzare il cerchietto avete bisogno di:
- un cerchietto di metallo (trovato a H&M)
- perline a forma di borchia (eh si sono delle perline, si possono cucire o incollare, la versione più comoda delle borchie che si sia mai vista! Cercatele online)
- colla
Put some glue behind the stud cone beads
Versate una goccia di colla sul retro delle perline
then glue them onto the headband.
Start from the centre and glue one stud,
then glue 3 studs on each side
at a distance of 3cm from each other.
e incollatele sul cerchietto metallico.
Partendo dal centro, incollate una borchia.
Aggiungetene 3 per lato distanziate circa 3 cm l'una dall'altra.


