Showing posts with label matter of style. Show all posts

Wednesday, July 10, 2013

Can you handle 6 meters of chain on your neck? Make your Mega fringe necklace!

chain necklace, fringe necklace, diy fringe necklace, diy necklace, diy jewelry,matter of style
Metal fringe necklace tutorial on Style.it

Extremely light, despite the amount of chain used, this necklace is made with 6 meters of gold chain. That's it. You don't need anything else to make it. Chain and pliers. No beads, no jump-rings, no rhinestones. It's chain connected to chain. It shines on its own and it's enough to make a statement necklace.
Wanna read the tutorial?

Sunday, June 2, 2013

What makes your look unique?

statement necklace, personalized jewelry, custom jewelry,talk about you collection
talk about you collection
statement necklace, personalized jewelry, custom jewelry,talk about you collection
Hear me roar necklace

statement necklace, personalized jewelry, custom jewelry,talk about you collection
hear me roar necklace
It takes years to create a style that it's only your own. You can be inspired by runways, your mom's style, vintage fashion, but it's the way you combine all these elements in your own way that makes your style personal and unique. Sometimes your style is all in the details, the accessories you wear make your look recognizable. That why  I created  four statement necklaces in collaboration with Best personalized jewelry  one for each personality inside you  to accessorize your look with character. My aim was to bring you  a collection of necklaces that will help you express yourself in any outfit.

statement necklace, personalized jewelry, custom jewelry,talk about you collection

You can choose between  RebelFierce, Daydreamer and Hear me Roar in gold color or
                                     
                                        Rebel, Fierce, Daydreamer and Hear me Roar in silver color.

These necklaces want to be a fresh take on statement jewelry. They're thin and delicate and suitable for everyday outfits, but they also emphasize your personality with a strong statement. If you like them you can find them at Best Personalized Jewelry.
Express yourself with your look. Let it talk about you.


#Show us your style. Inspire us!

If you get one of these necklaces, show us your unique way to wear it! Send me a pic of yourself in your stylish outfit (or tweet me).  I'll publish it in this page with your permission.
Your effort to inspire me and all Matter Of Style readers will be rewarded with a 20% discount code for a second purchase at Best Personalized Jewelry

Sunday, January 20, 2013

♥ Matter Of Style on H&M life ♥


Recently Matter Of Style has been featured on H&M life blog! I'm thankful and impressed that someone inside the giant that is H&M found and appreciated this blog and decided to talk about it!
Below you'll find out what H&M said about Matter Of Style and a recap of DIY tutorials I shared with you during the years inspired by H&M pieces.


click on the pic to enlarge it
a close up of the article

The article appeared in many international editions of H&M life, here's the Italian one:


Friday, November 23, 2012

The cape coat DIY reloaded: Finishing

cape coat sew along, cape coat diy,cape diy
The cape coat diy

cape coat sewalongCape coats are trending right now but you already know it!
A lot of you are making the DIY cape coat  I shared with you last winter season!
Since I received many questions about the finishing of the coat today we talk deeper about it.
These details are up to you. The coat can be done with one seam and will work without the collar but you can choose the level of customization you want based on your skills and taste.

This is what I did to finish my coat.


There is also another freebie for you, it's the corean collar free pattern I added to the coat.

I see dogtooth paired with brights in a lot of shops lately so I guess my cape will still be trendy this year! :D


For those of you that don't know anything about this cape coat you can download the free pattern here then follow the step by step tutorial to make it.


Le mantelle sono tornate di moda ma voi lo sapete già! Molte di voi infatti ne stanno realizzando una con il modello che ho condiviso con voi l'anno scorso. Avendo ricevuto molte domande sulle rifiniture oggi torniamo a parlarne.
La mantella può essere finita cucendo solo le spalle senza dover aggiungere colli o bottoni, le rifiniture poi dipenderanno dai vostri gusti.
Alla lista dei modelli scaricabili gratuitamente oggi si aggiunge anche il colletto alla coreana che ho realizzato per la mantella.
Se non avete mai sentito parlare di questa mantella potete scaricare qui il modello gratuito e poi seguire le spiegazioni per realizzarla.


 What I used:

  • 2,5 meters  of knitted dogtooth wool for the coat
  • same amount of torquoise taffeta lining
  • torquoise pannolenci for details 
  • 3 black buttons

 
After sewing the shoulders here's how to refine
  • The arm slashes
  • The collar
  • The lining
  • the buttons

Avrete bisogno di:
  •  2,5 metri di stoffa (la mia è di lana)
  • stesso metraggio di fodera
  • pannolence turchese per le rifiniture
  • 3 bottoni neri
Dopo aver cucito le spalle della mantella ecco come rifinire 
  •  le aperture per le braccia
  • il colletto alla coreana
  • la fodera
  • i bottoni

Refining the arm slashes


Cut the arm slashes
Tagliate le aperture per le maniche


Cut this triangle at the top of the slash

Tagliate un triangolo alla sommità del taglio come in figura

Fold the edges on the back

Ripiegate sul rovescio i bordi


It will look like this on the right side

Ecco come apparirà l'apertura a dritto


Cut two strips of torquoise pannolenci  (slightly longer than the slash) and put them close to each other on the inside of the slash. Let them touch so the slash will appear closed untill you put your arms into it.

Tagliate due striscie di pannolence poco più lunghe dell'apertura e posizionatele l'una affianco all'altra sul rovescio. Si devono toccare così l'apertura appare chiusa.


This is like it will look on the back
Ecco come appaiono sul rovescio

Finishing the collar

 
I put a adhesive facing behind the pannolenci - Ho stirato una teletta dietro al pannolence


Fold the wool fabric in half and cut one collar shape 
Cut from the collar pattern the 1 cm edge

Usate il modello una volta  sulla stoffa uguale alla mantella, il modello è metà colletto.
Ritagliate il bordo di un centimetro dal modello (segnato sul disegno) e ritagliatene la sagoma sulla stoffa.
La sagoma più grande tagliatela in pannolence.


Cut the big shape from pannolenci
Cut the 1 cm strip from wool
Sew the two pieces together 
Put the two collars one onto the other with the right sides together and sew the outer edge.
You get a pocket with one side open.

Where to sew the collar

As you can see from the finished cape pics the collar remains open at the center, it doesn't go over the row of buttons.

Cucite i due pezzi insieme. Mettete dritto contro dritto i due colletti e cuciteli insieme. Otterrete una tasca aperta in fondo. 

Dove cucire il colletto?
Come potete vedere dalle immagini della mantella finita, il colletto rimane aperto al centro cioè non si sovrappone alla striscia centrale in cui sono alloggiati i bottoni.  Questa striscia è indicata sul modello al centro davanti.

Adding the lining


Use again the pattern to cut another cape, just like you did with the coat

Usate il modello della mantella nuovamente sulla fodera.
Ritagliate un'altra mantella e cucitela.


Put the wrong sides of the fabrics together and stitch the lining on the edges of the coat, all around the hem and along the shoulder seam so the lining won't move.

Ora fate combaciare le due mantelle in modo che i due lati dritti rimangano visibili e cucite la fodera lungo tutto il bordo della mantella.
Cucite anche le spalle cosi la fodera non si muoverà.


Add the buttons


On the pattern there is a vertical line at the center front, that is the where you place the buttons.
 Try the coat on and use pins to decide where to place buttons
Place one just below the neck
Place the other two at a distance of 18 cm each.
Buttons go on the left side of the coat and the button holes on the right side.
Make button holes with your sewing machine or by hand (see how here) .

Sul modello c'è una striscia verticale al centro davanti: è dove andremo a mettere i bottoni.
Indossate la mantella e con gli spilli decidete dove mettere i bottoni.
Mettetene uno appena sotto al collo e gli altri due a distanza di 18 cm l'uno dall'altro.
I bottoni vanno sul lato sinistro mentre le asole sul lato destro.
Potete realizzare le asole con la macchina da cucire (leggete il manuale di istruzioni della macchina) oppure a mano (guardate come fare qui)


Saturday, May 5, 2012

Clear ice jewelry DIY

diy,fashion diy, my diy,jewelry diy,fashion jewelry, crystal clear jewelry,ice jewelry,recycle,matter of style,unique jewelry,
ice bones statement necklace
diy,fashion diy, my diy,jewelry diy,fashion jewelry, crystal clear jewelry,ice jewelry,recycle,matter of style,unique jewelry,
clear porcupine earrings
diy,fashion diy, my diy,jewelry diy,fashion jewelry, crystal clear jewelry,ice jewelry,recycle,matter of style,unique jewelry,
"Ice stalactite" earrings

With these jewelry I wanted to play with the shape and transparency of the material I used. The effect I wanted to obtain were ice scuptures.
Yesterday on my facebook and twitter I asked you to guess what was the raw material I used in this diy project. I gave you an hint: I told you it was clear, cheap and it could be found in a club. Plastic glasses and bottles, straws (actually a possibly fun material), rubber or perpex were the answers. Thanks for playing with me. Now that you see the jewelry I made do you recognize what they are made of? If not drum rolls and you'll find the answer and the tutorial after the jump!


Ieri su twitter e facebook  vi ho chiesto di indovinare il materiale che ho utilizzato per realizzare questi nuovi gioielli. Il suggerimento che vi ho dato era: è trasparente, economico e si può trovare in un locale. Avete risposto bicchieri e bottiglie di plastica, cannucce (effettivamente sarebbe divertente provare ad usarle), gomma e plexiglass. Grazie per aver partecipato al gioco. Ditemi, ora che li vedete, riconoscete di cosa son fatti i gioielli? Troverete la risposta e il tutorial giusto dopo il click!


yes, cocktail forks - con le forchettine da cocktail!
I needed plenty of them - ne sono servite tante
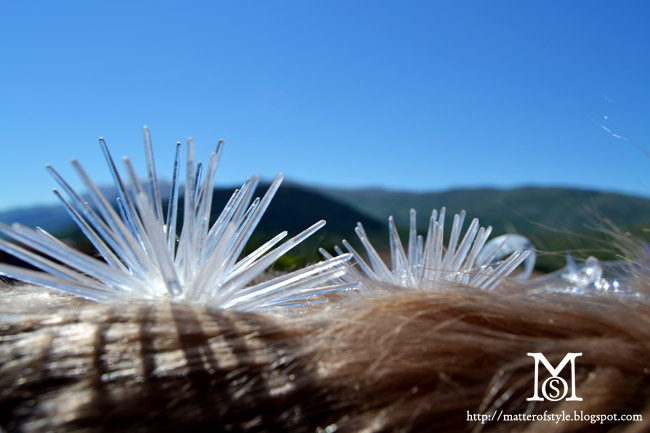
I cut their teeths manually then I used a soldering iron to melt plastic - Ho tagliato i denti delle forchette a mano e ho utilizzato un saldatore per fondere la plastica
At open air I heated plastic untill it melted and then I pressed  forks together- All'aperto ho scaldato la plastica fino a quando è diventata morbida e ho premuto le forchette una contro l'altra per unirle.
Forks can be cut in any point and pieces of every size can be obtained. They can be also pierced with heat. When the center part of the necklace was finished I added two rows of crystals on it, a couple of small pieces and an organza ribbon to tie it around my neck. - Le forchette possono essere tagliate in ogni punto e si possono quindi ottenere pezzi di ogni dimensione. Una volta finita la parte centrale ho aggiunto due striscie di cristalli e un nastro di organza per legare la collana al collo.
I did the same thing with forks' teeth. I heated and sticked them together until I obtained a spiky cluster of frosted nails. Ho ripetuto lo stesso procedimento per gli orecchini. Ho scaldato e unito i denti delle forchette fino ad ottenere un grappolo di punte.
Stalactite earrings have been obtained melting more forks together.

Gli orecchini con i ghiaccioli sono stati ottenuti fondendo insieme più forchette.

Thursday, May 3, 2012

Matter Of Style on Altered Couture

diy, crafts, my diy, fashion diy,altered couture magazine, altered couture summer 2012,stampington, matter of style, lion head shoes
Matter Of Style on Altered Couture summer 2012
diy, my diy, fashion diy,altered couture magazine, altered couture summer 2012,diy, creafts,stampington, matter of style, lion head shoes
my lion head shoes have been featured
diy, my diy, fashion diy,altered couture magazine, altered couture summer 2012,stampington, matter of style, lion head shoes
color block wedges
diy, my diy, fashion diy,altered couture magazine, altered couture summer 2012,stampington, matter of style, lion head shoes

Yes! A few of my diy have been featured on Altered Couture Magazine! I'm super excited and honored to be part to this magazine full of diy inspiration! I would like to thank the magazine Editor Beth Livesay for choosing me! It's been a pleasure to collaborate with her! My diy shoes had to celebrate! See more pics of the party (and more of the pages I'm in) after the jump!

Alcuni dei miei fai da te sono stati pubblicati sulla rivista americana Altered Couture! Vorrei ringraziare l'Editore Beth Livesay per avermi scelto! Le mie scarpe diy hanno organizzato un party per festeggiare. Troverete altre foto del party (e altre foto delle pagine in cui compaiono i miei progetti) dopo il click!


diy, my diy, fashion diy,altered couture magazine, altered couture summer 2012,stampington, matter of style, lion head shoes
face wedges diy
diy, my diy, fashion diy,altered couture magazine, altered couture summer 2012,stampington, matter of style, lion head shoes
someone partied too hard - studded shoes diy
sunglasses diy,custom sunglasses, fashion diy, altered couture, altered couture summer 2012
Baroque sunglasses DIY
draped skirt diy, skirt diy,fashion diy,altered couture, altered couture summer 2012
Draped skirt DIY
fashion diy,leopard jeans diy,painted fabric, fabric paint,altered couture, altered couture summer 2012
Leopard jeans DIY

Shoes have been selfish and didn't invite my others diy  that have been featured! Here they are!

Egoiste! Le scarpe non hanno invitato al party gli altri diy, ma eccoli qui sulla rivista!