Showing posts with label recycle. Show all posts

Thursday, September 20, 2012

Recycle & reuse : how to make a crystal bracelet with vase fillers

The thing I enjoy the most is take something around the house and transform it in a wearable piece.
Today I'll show you how to use then so called vase fillers. They are irregular pieces of plastic that look like crystals that are used mostly as a decoration element.  I enjoy wearing crystal clear pieces of jewelry right now so the only thing I had to do is pierce the plastic crystals turning them into beads and insert them in a elastic piece of thread. Voilà a new bracelet is done!

You'll need
elastic thread
a driller


La cosa che più mi diverte è utilizzare degli oggetti trovati qua e là per realizzare capi e accessori indossabili.
Oggi prenderemo in prestito dal salotto dei cristalli in plastica per realizzare un bracciale. Li potete trovare nei negozi tra i complementi d'arredo, sono utilizzati principalmente a scopo decorativo per riempire ciotole e vasi.  Basterà forarli per trasformarli in perline irregolari. A quel punto non resterà che infilarle in un filo elastico per completare il bracciale

Vi serviranno
cristalli in plastica
filo elastico
un trapano
crystal rocks vase fillers

 I used heat to pierce them but you can also use a driller. Don't worry if you pierce them in different spots because this will help you to give movement to the bracelet. Be very careful when you use these kind of tools.

Potete usare un trapano per forarle oppure un saldatore. Fate molta attenzione nell'usare entrambi gli utensili.
 Non importa se i fori saranno in punti diversi. anzi contribuiranno a creare movimento.

Once pierced they can be inserted in a plastic thread.

Una volta forate infilate le perline nel filo elastico e annodatelo.

Saturday, May 5, 2012

Clear ice jewelry DIY

diy,fashion diy, my diy,jewelry diy,fashion jewelry, crystal clear jewelry,ice jewelry,recycle,matter of style,unique jewelry,
ice bones statement necklace
diy,fashion diy, my diy,jewelry diy,fashion jewelry, crystal clear jewelry,ice jewelry,recycle,matter of style,unique jewelry,
clear porcupine earrings
diy,fashion diy, my diy,jewelry diy,fashion jewelry, crystal clear jewelry,ice jewelry,recycle,matter of style,unique jewelry,
"Ice stalactite" earrings

With these jewelry I wanted to play with the shape and transparency of the material I used. The effect I wanted to obtain were ice scuptures.
Yesterday on my facebook and twitter I asked you to guess what was the raw material I used in this diy project. I gave you an hint: I told you it was clear, cheap and it could be found in a club. Plastic glasses and bottles, straws (actually a possibly fun material), rubber or perpex were the answers. Thanks for playing with me. Now that you see the jewelry I made do you recognize what they are made of? If not drum rolls and you'll find the answer and the tutorial after the jump!


Ieri su twitter e facebook  vi ho chiesto di indovinare il materiale che ho utilizzato per realizzare questi nuovi gioielli. Il suggerimento che vi ho dato era: è trasparente, economico e si può trovare in un locale. Avete risposto bicchieri e bottiglie di plastica, cannucce (effettivamente sarebbe divertente provare ad usarle), gomma e plexiglass. Grazie per aver partecipato al gioco. Ditemi, ora che li vedete, riconoscete di cosa son fatti i gioielli? Troverete la risposta e il tutorial giusto dopo il click!


yes, cocktail forks - con le forchettine da cocktail!
I needed plenty of them - ne sono servite tante
I cut their teeths manually then I used a soldering iron to melt plastic - Ho tagliato i denti delle forchette a mano e ho utilizzato un saldatore per fondere la plastica
At open air I heated plastic untill it melted and then I pressed  forks together- All'aperto ho scaldato la plastica fino a quando è diventata morbida e ho premuto le forchette una contro l'altra per unirle.
Forks can be cut in any point and pieces of every size can be obtained. They can be also pierced with heat. When the center part of the necklace was finished I added two rows of crystals on it, a couple of small pieces and an organza ribbon to tie it around my neck. - Le forchette possono essere tagliate in ogni punto e si possono quindi ottenere pezzi di ogni dimensione. Una volta finita la parte centrale ho aggiunto due striscie di cristalli e un nastro di organza per legare la collana al collo.
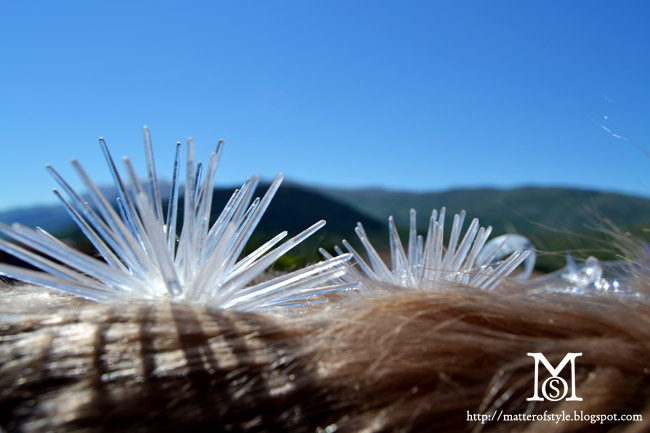
I did the same thing with forks' teeth. I heated and sticked them together until I obtained a spiky cluster of frosted nails. Ho ripetuto lo stesso procedimento per gli orecchini. Ho scaldato e unito i denti delle forchette fino ad ottenere un grappolo di punte.
Stalactite earrings have been obtained melting more forks together.

Gli orecchini con i ghiaccioli sono stati ottenuti fondendo insieme più forchette.

Sunday, February 19, 2012

Stella MCartney inspired cut out dress with wavy hem DIY

stella mccartney dress,dress diy,diy,fashion diy,how to,cut out dress,wavy hem,spring 2012stella mccartney dress,dress diy,diy,fashion diy,how to,cut out dress,wavy hem,spring 2012
stella mccartney dress,dress diy,diy,fashion diy,how to,cut out dress,wavy hem,spring 2012

Yesterday we talked about wavy hems and how they are trending this spring. I really appreciated how Stella MCartney incorporated curled hems in her spring 2012 collection. Today I'll show you how to diy a similar dress cutting out one you already own. I will also show you a crochet technique to make a cord I used to decorate the dress: it's called the romanian cord (or european macramè).

Start with a long sleeve dress. I made my dress from scratch because I had a very cute piece of fabric that was perfect for this project. The project is all about cutting out so a dress you already own will be fine.
Ready to start? Follow me after the jump.


stella mccartney dress,dress diy,diy,fashion diy,how to,cut out dress,wavy hem,spring 2012

I put my dress on my diy dress form (or just wear the dress). Highlighted in the pic you can see the part of the fabric you have to cut it out. Start cutting on the shoulders, 1 inch far from the neckline, cut off the cleavage untill the armhole. Also cut off one sleeve.

stella mccartney dress,dress diy,diy,fashion diy,how to,cut out dress,wavy hem,spring 2012
This is how the neckline looks once cut
stella mccartney dress,dress diy,diy,fashion diy,how to,cut out dress,wavy hem,spring 2012

Now let's cut the wavy hem.

stella mccartney dress,dress diy,diy,fashion diy,how to,cut out dress,wavy hem,spring 2012

stella mccartney dress,dress diy,diy,fashion diy,how to,cut out dress,wavy hem,spring 2012
This is how the dress should look once cut
 Now let's decorate it! Stella MCartney's dress is heavy embroidered along the neckline and along the hem. To imitate this embroidery I made a few meters of crochet cord (but you can also buy a cord or a cute trim). This cord is called romanian cord (or european macramè) and it's easy to do if you know the basics of crochet, click on this link to learn how to do the romanian cord.

stella mccartney dress,dress diy,diy,fashion diy,how to,cut out dress,wavy hem,spring 2012
this is how the romanian cord looks like
stella mccartney dress,dress diy,diy,fashion diy,how to,cut out dress,wavy hem,spring 2012
I pinned the cord over the dress then I sewed it
stella mccartney dress,dress diy,diy,fashion diy,how to,cut out dress,wavy hem,spring 2012
And this is how the embroidery looks like when done.

stella mccartney dress,dress diy,diy,fashion diy,how to,cut out dress,wavy hem,spring 2012

And this is how the dress looks once finished.
I hope you liked this tutorial, happy Sunday!
See other diy cloths here.

Tuesday, December 27, 2011

Make a jewelry holder with a box of chocolates

how make jewelry holder,jewelry holder,chocolates box,diy


This is not properly a tutorial it's more a suggestion on how to recycle a box of chocolates turning it into a rings holder. The tough part comes first: you and your friends have to eat all the chocolates then you can insert all your fancy rings into the box so they are clearly on display and you can quickly choose between them.

Quello di oggi non è propriamente un tutorial è più un suggerimento su come riciclare una scatola di cioccolatini trasformandola in un porta gioielli. La parte più difficile sarà sicuramente consumare i cioccolatini ma con l'aiuto di qualche amico ce la potete fare; poi andrete a riempire la scatola con i vostri anelli o anche orecchini così saranno esposti in bella vista e potrete scegliere rapidamente quali indossare.

how make jewelry holder,jewelry holder,chocolates box,diy

Wednesday, December 21, 2011

DIY idea: pom pon scarf

pom pon scarf,pom pon tutorial,pom pon diy,sandra backlund pom pon
colored pom pon scarf Accessorize - white pom pon scarf-top by Sandra Backlund

During these cold days the scarf is one key accessory we cannot live without. The pom pon scarf  is cute and can be easily made at home. Anyone can do pom pons, they're a quick , no sew diy project. If you like the multi colored one pictured above you can even make a new scarf recycling yarn leftover so you'll have a new scarf for free
Do you think a pom pon scarf is only suitable for kids? Have a look at the picture on the right where we see pom pons going high fashion in the scuptural white top by Sandra Backlund.
So bottom line: how do we make a pom pon?

how make pom pon,pom pon tutorial,pom pon diy
how to make a pom pon picture via fashion crochet
What do you need?
carboard
scissors
yarn
  1. cut two discs of cardboard 3 inches wide (the width sets the dimensions of the finished pom pon)
  2. overlap the two discs
  3. wrap the yarn around the discs until they're full (the more yarn you add the fuller the pom pon will be)
  4. use the scissors and cut all loops along the edges
  5. carefully separate the discs unveiling the center of the pom pon; cut another piece of yarn and knot  all the yarns together at the center
  6. remove the discs,  and you've done
After making several pom pons connect them using another piece of yarn and a needle, insert a pom pon after another and you've done!  
PS: the pom pon scarf can make a nice Christmas gift!


Durante le fredde giornate d'inverno la sciarpa è un accessorio di cui non possiamo fare a meno. La sciarpa con i pom pon è simpatica e può essere realizzata in casa. Tutti possono realizzare i pom pon, sono veloci e non richiedono alcuna cucitura. Se volete una sciarpa multicolore come quella di Accessorize potrete addirittura realizzarla riciclando gli avanzi di gomitoli che avete in casa ottenendo una nuova sciarpa completamente gratis. Se pensate che i pom pon siano adatti solo ai bambini ricredetevi guardando il top couture realizzato da Sandra Backlund. Allora, come si realizzano i pom pon?

Avete bisogno di:
cartone
forbici
lana

  1. ritagliate due dischi di cartone del diametro di 7 centimetri ( la dimensione dei dischi determinerà la dimensione finale dei pom pon)
  2. sovrapponete i due dischi
  3. avvolgete il filo intorno ai dischi fino a ricoprirli (più filo aggiungerete più pieni risulteranno i pom pon)
  4. usando le forbici ritagliate gli anelli di lana sul bordi dei dischi
  5. separate con cura i dischi scoprendo così il centro del pom pon;  tagliate un altro pezzo di filo e formate un nodo al centro bloccando tutti i fili insieme
  6. a questo punto rimuovete i dischi di cartone e il pom pon è fatto.
Dopo aver realizzato più pom pon connetteteli prendendo ago e filo e infilandoli uno dietro l'altro e la sciarpa è pronta!

PS: la sciarpa con i pom pon può essere un perfetto regalo di Natale!

Wednesday, June 1, 2011

DIY idea: reclycled paper earrings


How cute are these jewels made of reclycled materials! They come from Rebekah’s ‘The Pretties’ Cargoh shop. They're very easy to do:only few pages from books or magazines are needed. Cut some strips from your pages and then slice the paper. Now roll the strips to obtain a tassel or open the fringes to make a nice flower! Glue the embellish on the base of a ring or add hooks to obtain an unconvetional pair of earrings!


Guardate che carini questi gioielli fatti di carta riciclata! Sono in vendita qui. Sono d'effetto e molto semplici da realizzare. Avrete bisogno solo di alcuni fogli di carta per realizzarli presi da un libro o da qualche rivista. Tagliatene delle striscie e poi sfrangiateli. Arrotolate e incollate poi la striscia per ottenere nappine o aprite le frangie per ottenere dei bei fiori. Infine incollate l'ornamento sulla base di un anello o attaccateci dei gancetti per realizzare gli orecchini!